I built a minimal clone of Lusha's sales prospecting feature, and in this article you'll get to see exactly how I did that:
- Where to get the data for the clone
- Build the search and filter functions based on various person's parameters
- Cache past searches
- How to build the UI
- And more
At the very end, I appended the full code for this clone, which you can use straight away to build your own Lusha sales prospecting minimal clone to get that $1M ARR in 18 months.
Quick update before we start: Proxycurl has been sunset. I built Proxycurl, and I now work on NinjaPear. I am leaving the original Proxycurl implementation in this article because the build flow is still useful, but wherever it matters, I am also showing you the working NinjaPear path so you do not follow a dead product.
To get 110 contact numbers on Lusha, we had to build a project of 1100 on Linkedin. So only a 10% succcess rate. We called all 110 numbers and circa 40% of them wouldn't connect.
That is the real reason this tutorial exists. Not because cloning SaaS UIs is cute. Because teams want the workflow, but they do not want to be boxed into one vendor's limits.
Access the original demo clone here.
How it will look with a list of profiles returned:
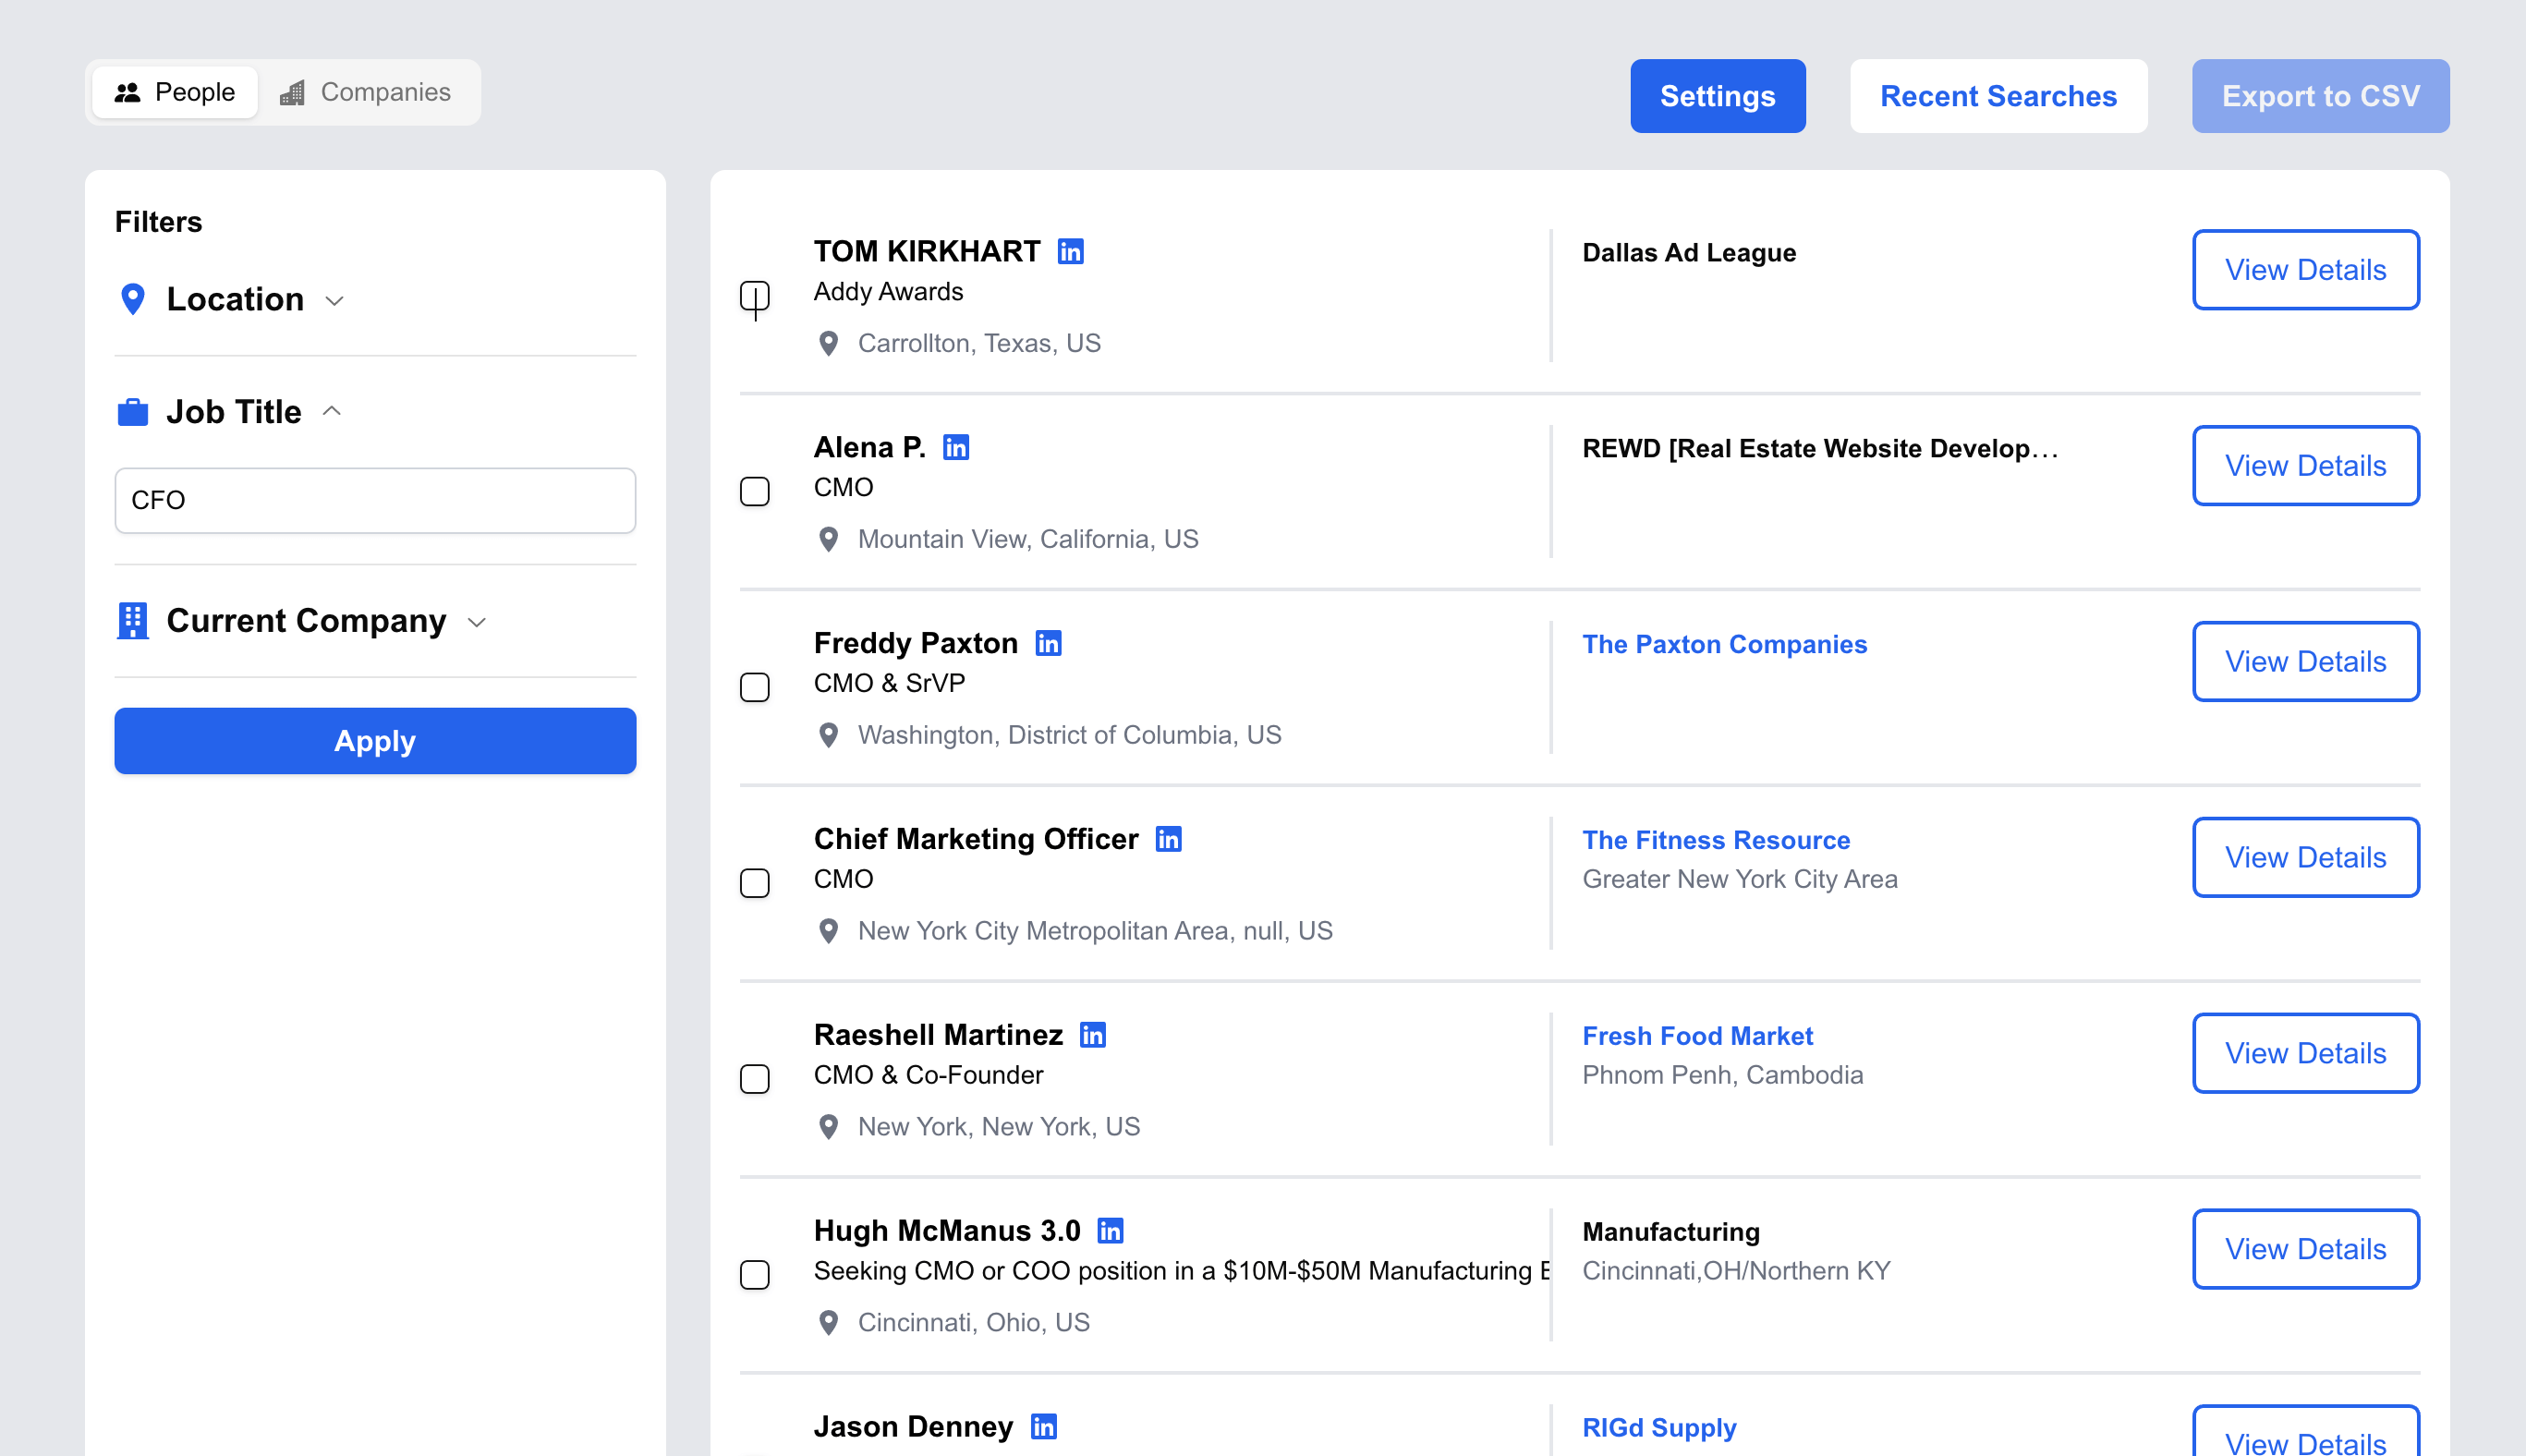
You get a list of CFOs based on your search input on the left.
Here is a quick sneak peek of the whole thing:
A close-to-fully-functioning prospector with filters based on location, role and company.
Features of the Lusha sales prospecting clone
This is the feature of Lusha that I cloned, their prospect search feature:
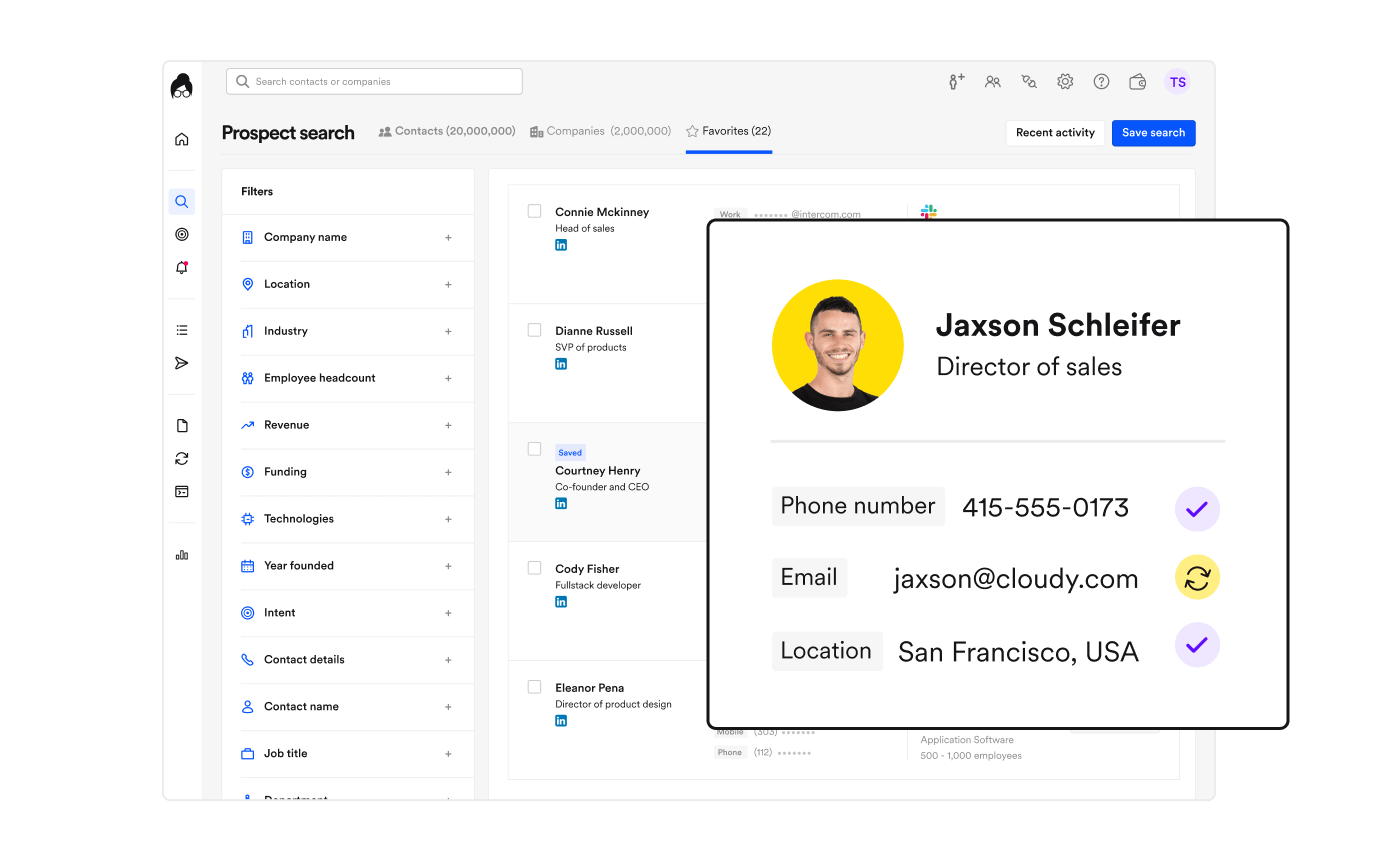
This is the Lusha prospect search feature I'm cloning. Source: Lusha homepage.
The clone will not have all the filters you see on the left above, because that would be the same as building a full SaaS tool already. Still, it is comprehensive enough to be useful.
The app will have the following features:
- Search LinkedIn profiles with country, job title and company
- Export LinkedIn profiles to CSV
- Save last 10 queries to recent searches in local storage
- Save API key to local storage
- View details modal to display person experiences and education
Prerequisites
You'll need these to get started:
- Node v18+
- A Proxycurl account, if you want to follow the original implementation in this article
- A NinjaPear account, if you want the working replacement path
- Basic knowledge of React.js and Next.js
- Basic knowledge of Tailwind CSS
Now, let's get building.
Register for a Proxycurl account
Proxycurl was a data enrichment company offering APIs that pulled person data, company data, contact info and more. Users liked the ease of use, the ability to pull data from the get-go with just the API key, and the data freshness.
For the same reasons, it was the data enrichment tool that I used to feed this Lusha sales prospecting clone.
- Register for an account here
- Get 100 free credits if you sign up with a work email, or 10 credits for a personal email
- Get your API key in the dashboard here
The working alternative: NinjaPear
If you're building this today, use NinjaPear. The closest current replacement path is a mix of the Employee API for person profiles from public sources, plus Prospector if you want the spreadsheet-style workflow on top.
One important caveat: NinjaPear is not a drop-in 1:1 clone of old Proxycurl's exact Person Search endpoint. So if your goal is to learn the UI and query flow, the article still holds. If your goal is production, wire the same UI into NinjaPear's current people and company primitives instead of the sunset Proxycurl endpoint.
Users feel this same pain in the market too:
Cycle through most of the big players free trials to get a feel for them. Plus saves any spending for a few months! I have found most of them to be the same tbh but keep revisiting Linked Sales Nav and Apollo. Used to love crunchbase.
That is why I would rather show you architecture you control than tell you to marry one data vendor forever.
Create a new Next.js project
npx create-next-app@latest hursa
cd hursa
npm run dev
Make sure to enable Tailwind CSS. The rest of the Next.js options are up to your preference.
Let's start by building the tabs. To save time, I'll use shadcn components.
npx shadcn@latest add tabs button input accordion checkbox dialog
npm install react-icons --save
Then modify app/page.js:
"use client";

import { Tabs, TabsList, TabsTrigger, TabsContent } from "@/components/ui/tabs";
import { BsPeopleFill, BsBuildingsFill } from "react-icons/bs";
import { Button } from "@/components/ui/button";
import PeopleFilter from "@/components/PeopleFilter";
import { useState } from "react";

export default function Home() {
  const [peoplePayload, setPeoplePayload] = useState({
    country: "",
    current_role: "",
    current_company_name: "",
  });

  return (
    <div className="p-8 bg-gray-200 min-h-full">
      <Tabs defaultValue="people" className="max-w-7xl mx-auto relative">
        <TabsList>
          <TabsTrigger value="people" className="flex items-center gap-2 flex-grow-0">
            <BsPeopleFill />
            People
          </TabsTrigger>
          <TabsTrigger value="company" className="flex items-center gap-2 flex-grow-0">
            <BsBuildingsFill />
            Companies
          </TabsTrigger>
        </TabsList>

        <div className="absolute right-0 top-0 flex gap-6">
          <Button className="flex items-center gap-2 bg-blue-600 text-white px-4 rounded-md py-2 disabled:opacity-50 font-semibold">
            Settings
          </Button>
          <Button className="flex items-center gap-2 bg-white text-blue-600 px-4 rounded-md py-2 disabled:opacity-50 font-semibold">
            Recent Searches
          </Button>
          <Button className="flex items-center gap-2 bg-blue-600 text-white px-4 rounded-md py-2 disabled:opacity-50 font-semibold">
            Export to CSV
          </Button>
        </div>

        <TabsContent value="people" className="w-full mt-6 min-h-56">
          <div className="flex gap-6">
            <div className="w-1/4 bg-white rounded-lg p-4">
              <h3 className="font-bold">Filters</h3>
            </div>
            <div className="w-3/4 bg-white rounded-lg p-4">
              <h3 className="font-bold">People profiles results</h3>
            </div>
          </div>
        </TabsContent>

        <TabsContent value="company" className="w-full mt-6">
          <div className="flex gap-6">
            <div className="w-1/4 bg-white rounded-lg p-4">
              <h3 className="font-bold">Filters</h3>
            </div>
            <div className="w-3/4 bg-white rounded-lg p-4">
              <h3 className="font-bold">Company profiles results</h3>
            </div>
          </div>
        </TabsContent>
      </Tabs>
    </div>
  );
}
You should now be able to see:
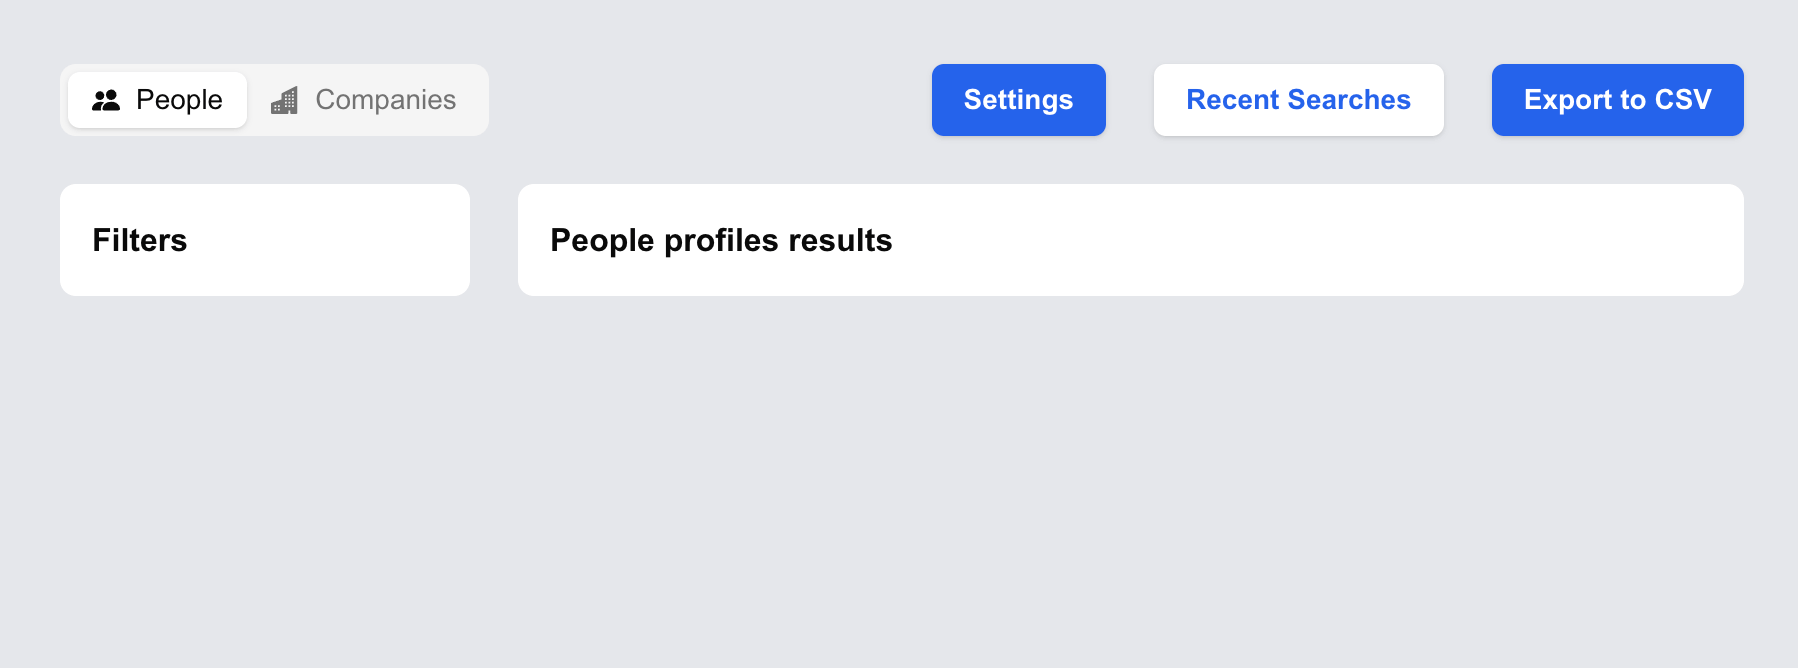
First step down.
Build the people filters
Instead of building a full Lusha app with all possible filters, for this clone I'm using only these 3 parameters for now:
country, which we will label asLocationcurrent_role_title, which we will label asJob titlecurrent_company_name, which we will label asCurrent Company
These are parameters that were available with Proxycurl's Person Search API, which is what the original version of this article used to build the search function for the clone. The old Person Search API had other parameters too, such as linkedin_groups, skills, past_company_name and many more.
If you are implementing this with NinjaPear today, keep the same filters in the UI. The backend mapping changes, not the front end. That is the main thing I want you to preserve from this article.
Implement the people filter component
To make the filter UI cleaner, we will use an accordion instead of dumping multiple input fields on screen at once.
Create components/PeopleFilter.jsx:
import React from "react";
import {
  Accordion,
  AccordionContent,
  AccordionItem,
  AccordionTrigger,
} from "@/components/ui/accordion";
import { IoMdBriefcase } from "react-icons/io";
import { FaBuilding } from "react-icons/fa";
import { IoLocationSharp } from "react-icons/io5";
import { Button } from "@/components/ui/button";
import { Input } from "@/components/ui/input";

const PeopleFilter = ({ payload, setPayload }) => {
  return (
    <div>
      <h3 className="font-bold">Filters</h3>
      <Accordion type="single" collapsible>
        <AccordionItem value="country">
          <AccordionTrigger className="flex justify-start gap-2">
            <IoLocationSharp
              style={{ transform: "rotate(0deg)" }}
              className="h-5 w-5 text-blue-600 inline-block"
            />
            <span className="text-lg font-bold">Location</span>
          </AccordionTrigger>
          <AccordionContent>{/* Autocomplete component here */}</AccordionContent>
        </AccordionItem>

        <AccordionItem value="current-role">
          <AccordionTrigger className="flex justify-start gap-2">
            <IoMdBriefcase
              style={{ transform: "rotate(0deg)" }}
              className="h-5 w-5 text-blue-600 inline-block"
            />
            <span className="text-lg font-bold">Job Title</span>
          </AccordionTrigger>
          <AccordionContent>
            <Input
              type="text"
              placeholder="Software Engineer"
              className="border border-gray-300 rounded-md p-2"
              value={payload.current_role_title}
              onChange={(e) =>
                setPayload({ ...payload, current_role_title: e.target.value })
              }
            />
          </AccordionContent>
        </AccordionItem>

        <AccordionItem value="current-company">
          <AccordionTrigger className="flex justify-start gap-2">
            <FaBuilding
              style={{ transform: "rotate(0deg)" }}
              className="h-5 w-5 text-blue-600 inline-block"
            />
            <span className="text-lg font-bold">Current Company</span>
          </AccordionTrigger>
          <AccordionContent>
            <Input
              type="text"
              placeholder="Current Company"
              className="border border-gray-300 rounded-md p-2"
              value={payload.current_company_name}
              onChange={(e) =>
                setPayload({ ...payload, current_company_name: e.target.value })
              }
            />
          </AccordionContent>
        </AccordionItem>

        <div className="flex justify-center">
          <Button className="w-full mt-4 bg-blue-600 text-white text-md font-semibold">
            Apply
          </Button>
        </div>
      </Accordion>
    </div>
  );
};

export default PeopleFilter;
And then in app/page.js:
import PeopleFilter from "@/components/PeopleFilter";
import { useState } from "react";

const [peoplePayload, setPeoplePayload] = useState({
  country: "",
  current_role: "",
  current_company_name: "",
});

const [peopleResults, setPeopleResults] = useState([]);

// inside the people tab, replace:
// <h3 className="font-bold">Filters</h3>
// with:
<PeopleFilter payload={peoplePayload} setPayload={setPeoplePayload} />
Now you have the filters built:
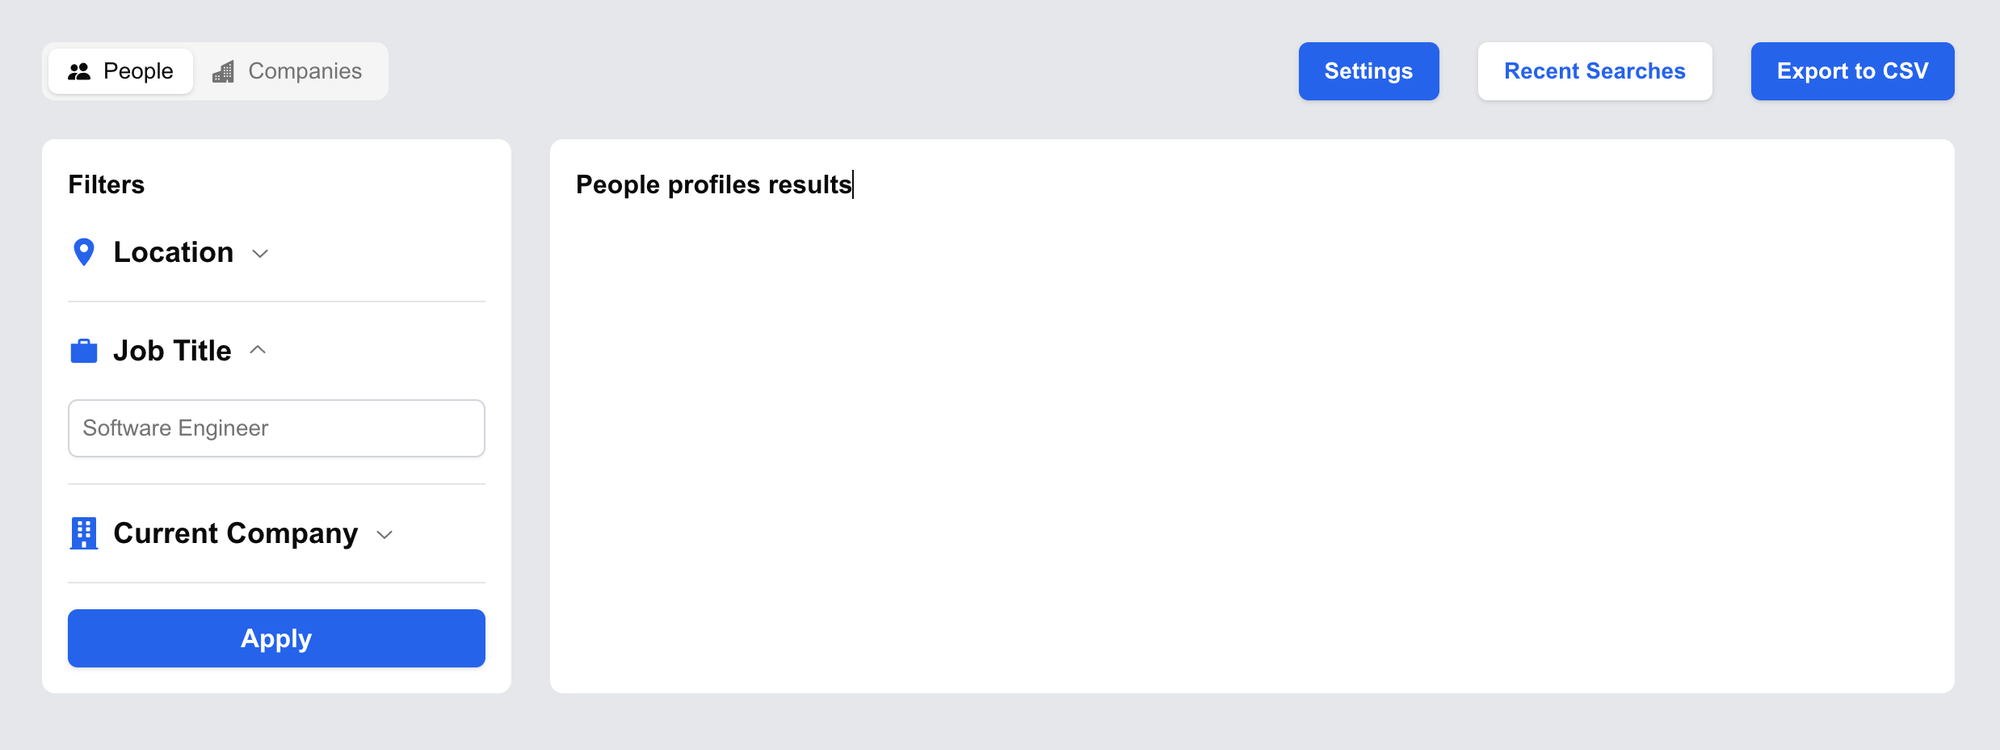
Filters, done.
Country ISO autocomplete component
To deliver a better UX, instead of a select element with a long list of countries, we will build a custom autocomplete for the location.
First we need this JSON for the options, lib/countryISO.json:
[
  { "value": "AD", "label": "Andorra" },
  { "value": "AE", "label": "United Arab Emirates" },
  { "value": "AF", "label": "Afghanistan" }
]
The rest of the JSON is available here on our GitHub repo.
Create components/Autocomplete.jsx:
import React, { useState, useRef, useEffect } from "react";
import options from "../lib/countryISO.json";
import { Input } from "@/components/ui/input";

const AutoComplete = ({ setSelectedOption }) => {
  const [inputValue, setInputValue] = useState("");
  const [filteredOptions, setFilteredOptions] = useState([]);
  const dropdownRef = useRef(null);

  const handleChange = (e) => {
    const value = e.target.value;
    setInputValue(value);
    setFilteredOptions(
      options.filter((option) =>
        option.label.toLowerCase().includes(value.toLowerCase())
      )
    );
  };

  const handleSelect = (option) => {
    setSelectedOption(option.label);
    setInputValue(option.label);
    setFilteredOptions([]);
  };

  const handleClickOutside = (event) => {
    if (dropdownRef.current && !dropdownRef.current.contains(event.target)) {
      setFilteredOptions([]);
    }
  };

  useEffect(() => {
    document.addEventListener("mousedown", handleClickOutside);
    return () => {
      document.removeEventListener("mousedown", handleClickOutside);
    };
  }, []);

  return (
    <div className="relative" ref={dropdownRef}>
      <Input
        type="text"
        value={inputValue}
        onChange={handleChange}
        placeholder="United States"
        className="border border-gray-300 rounded p-2 w-full mt-6"
      />
      {filteredOptions.length > 0 && (
        <ul className="relative bg-white border border-gray-300 rounded mt-1 w-full z-10 max-h-40 overflow-y-auto">
          {filteredOptions.map((option, index) => (
            <li
              key={index}
              onClick={() => handleSelect(option)}
              className="p-2 hover:bg-gray-200 cursor-pointer z-50"
            >
              {option.label}
            </li>
          ))}
        </ul>
      )}
    </div>
  );
};

export default AutoComplete;
And then import it into components/PeopleFilter.jsx:
import AutoComplete from "./AutoComplete";

// replace {/* Autocomplete component here */}
<AutoComplete
  setSelectedOption={(value) => setPayload({ ...payload, country: value })}
/>
Now there will be a dropdown list of countries relevant to what the user is typing. Much better UX.
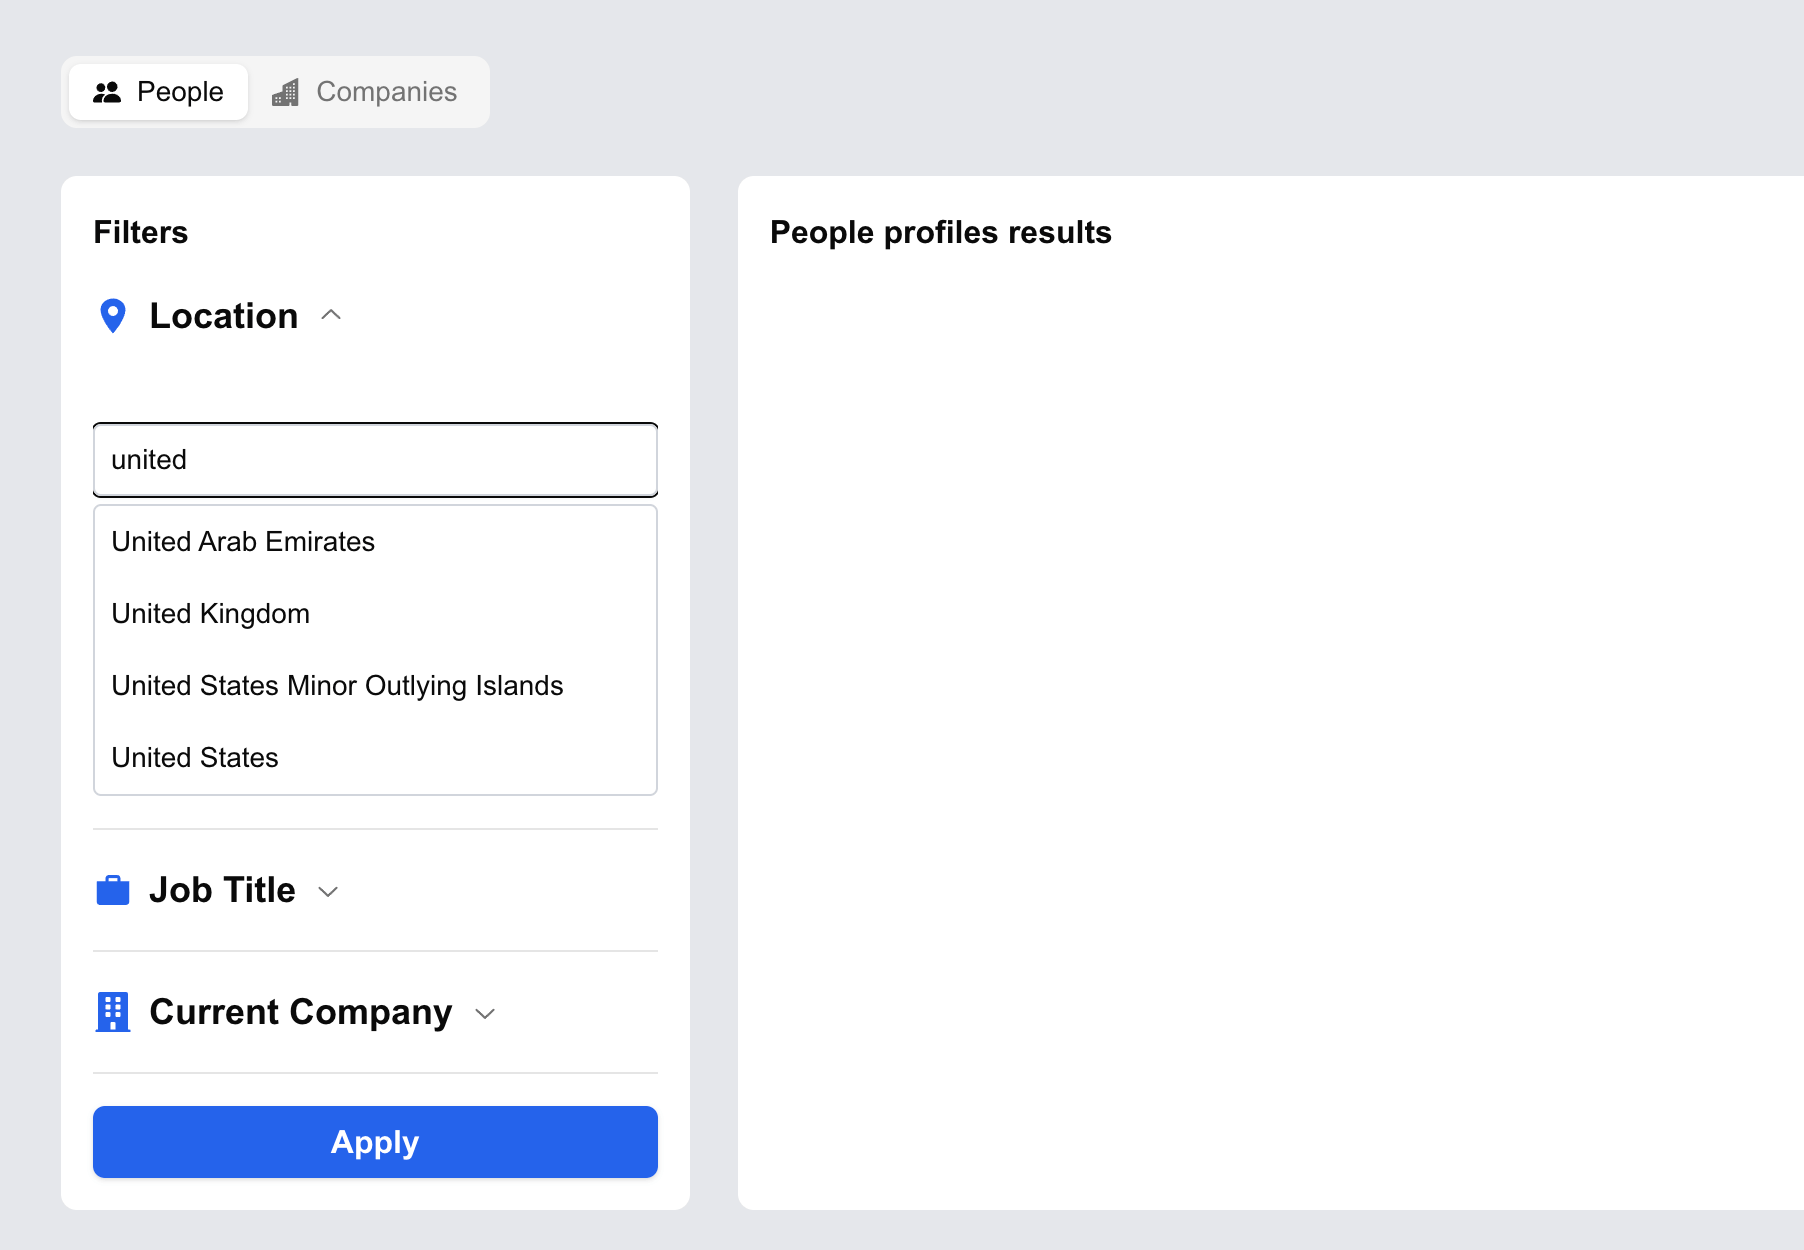
We do not just build things that work. We build things that are nice to use too.
Build the people result component
Let's mock the result and call it personSearchMock.json in the lib/ directory so we can start building the UI.
You can get it from the sample response in the old Person Search docs or from our GitHub repo.
import mockPersonSearch from "@/lib/personSearchMock.json";

const [peopleResults, setPeopleResults] = useState(mockPersonSearch.results);

// replace:
// <h3 className="font-bold">People profiles results</h3>
// with:
<PeopleResult results={peopleResults} />
Now create components/PeopleResult.jsx:
import React, { useState } from "react";
import { FaLinkedin } from "react-icons/fa";
import { IoLocationSharp } from "react-icons/io5";
import { Checkbox } from "@radix-ui/react-checkbox";
import Link from "next/link";
import { Button } from "@/components/ui/button";
import Modal from "./Modal";

const PeopleResult = ({ results, selectedPeople, setSelectedPeople }) => {
  const [isModalOpen, setIsModalOpen] = useState(false);
  const [viewDetails, setViewDetails] = useState(null);

  const handleViewDetails = (person) => {
    setViewDetails(person);
    setIsModalOpen(true);
  };

  return (
    <div>
      {results.map((person) => {
        return (
          <div
            key={person.profile.public_identifier}
            className="flex border-b-2 border-gray-200 py-4"
          >
            <Checkbox
              className="mr-6 self-center"
              checked={selectedPeople.includes(person)}
              onCheckedChange={(checked) => {
                if (checked) {
                  setSelectedPeople([...selectedPeople, person]);
                } else {
                  setSelectedPeople(
                    selectedPeople.filter(
                      (p) =>
                        p.profile.public_identifier !==
                        person.profile.public_identifier
                    )
                  );
                }
              }}
            />

            <div className="flex flex-col border-r-2 border-gray-200 w-[400px] truncate pr-4">
              <div className="flex items-center gap-2 flex-0">
                <a
                  className="text-black block text-md font-semibold"
                  href={person.linkedin_profile_url}
                  target="_blank"
                  rel="noopener noreferrer"
                >
                  {person.profile.full_name}
                </a>
                <FaLinkedin className="text-blue-600" />
              </div>

              <p className="text-sm">{person.profile.experiences[0].title}</p>

              <div className="flex items-center gap-2 mt-2">
                <IoLocationSharp className="text-gray-500" />
                <span className="text-gray-500 text-sm">{`${person.profile.city}, ${person.profile.state}, ${person.profile.country}`}</span>
              </div>
            </div>

            <div className="w-[300px] truncate px-4">
              {person.profile.experiences[0].company_linkedin_profile_url ? (
                <Link
                  href={person.profile.experiences[0].company_linkedin_profile_url}
                  target="_blank"
                  rel="noopener noreferrer"
                >
                  <span className="text-blue-600 text-sm font-semibold">
                    {person.profile.experiences[0].company}
                  </span>
                </Link>
              ) : (
                <span className="text-sm font-semibold">
                  {person.profile.experiences[0].company}
                </span>
              )}

              {person.profile.experiences[0].location ? (
                <span className="block text-sm text-gray-500">
                  {person.profile.experiences[0].location}
                </span>
              ) : null}
            </div>

            <div className="ml-auto">
              <Button
                onClick={() => handleViewDetails(person)}
                className="border-2 border-blue-600 bg-white text-blue-600 px-4 py-2 rounded-md hover:text-white"
              >
                View Details
              </Button>
            </div>
          </div>
        );
      })}

      <Modal
        isOpen={isModalOpen}
        setIsOpen={setIsModalOpen}
        viewDetails={viewDetails}
      />
    </div>
  );
};

export default PeopleResult;
Tada. Now you get a person profile in the result modal.
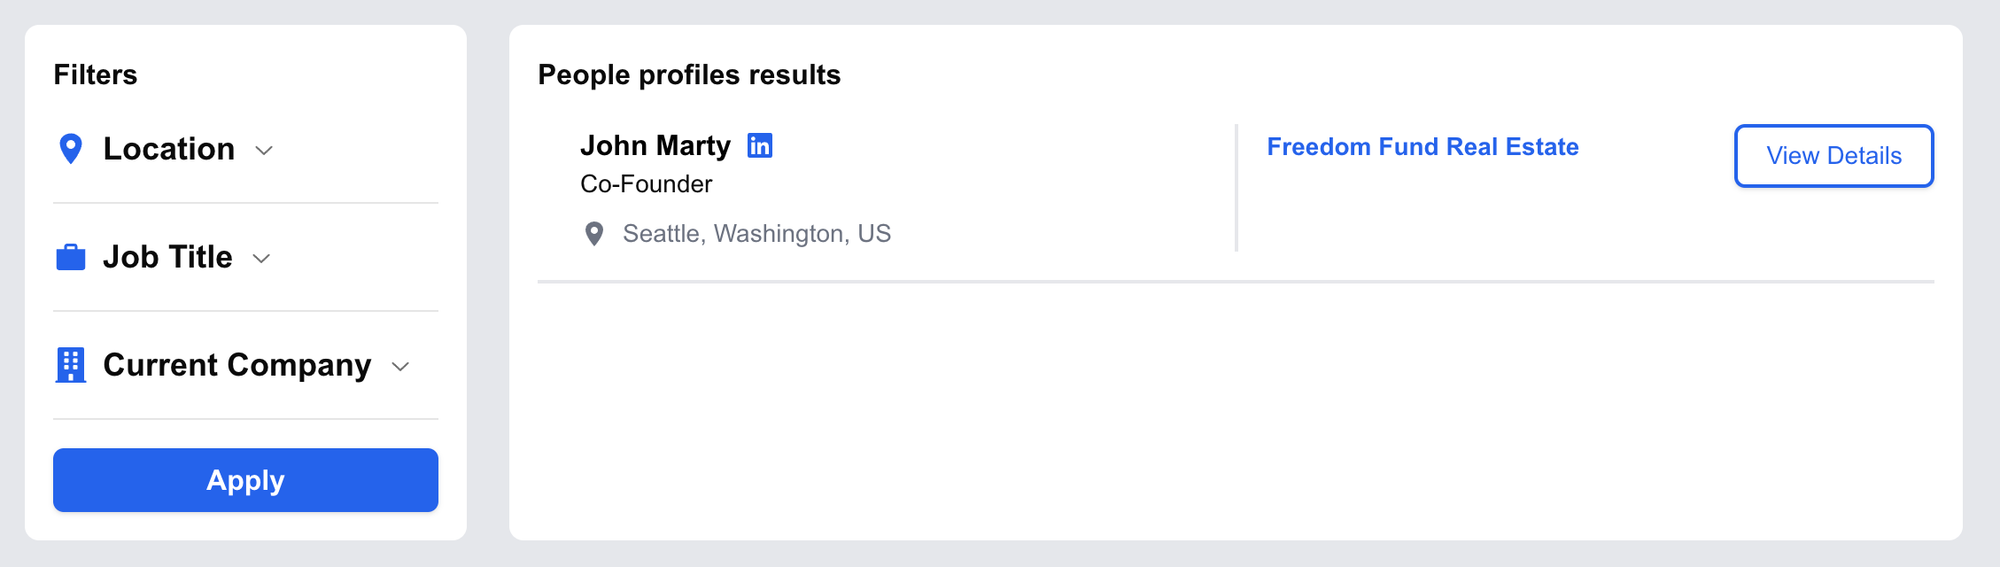
The first result now shows.
Next, let's build the modal component that shows experiences and education when the View Details button is clicked.
Create components/Modal.jsx:
import React from "react";
import {
  Dialog,
  DialogContent,
  DialogDescription,
  DialogHeader,
  DialogTitle,
} from "@/components/ui/dialog";

const Modal = ({ isOpen, setIsOpen, viewDetails }) => {
  if (!viewDetails) return null;

  return (
    <Dialog open={isOpen} onOpenChange={setIsOpen}>
      <DialogContent className="max-w-5xl">
        <DialogTitle>
          <span className="truncate">{`${viewDetails.profile.full_name} - ${viewDetails.profile?.headline}`}</span>
        </DialogTitle>

        <DialogHeader>
          <DialogDescription>
            <span className="truncate text-sm">
              <span>{viewDetails.profile.city && viewDetails.profile.city}</span>
              <span>{viewDetails.profile.state && `, ${viewDetails.profile.state}`}</span>
              <span>{viewDetails.profile.country && `, ${viewDetails.profile.country}`}</span>
            </span>

            {viewDetails.profile.experiences.length > 0 && (
              <>
                <h2 className="text-lg font-bold mt-6 mb-2">Experiences</h2>

                <div className="flex flex-col gap-2">
                  {viewDetails.profile.experiences.map((experience, index) => (
                    <div key={`${experience.title}-${index}`}>
                      <span className="block text-sm text-gray-600 font-semibold">{`${experience.title} at ${experience.company}`}</span>
                      <span className="block text-sm text-gray-500">
                        {experience.starts_at?.day &&
                          `${experience.starts_at.day}/${experience.starts_at.month}/${experience.starts_at.year} - `}

                        {experience.ends_at?.day
                          ? `${experience.ends_at.day}/${experience.ends_at.month}/${experience.ends_at.year}`
                          : "Present"}
                      </span>
                    </div>
                  ))}
                </div>
              </>
            )}

            {viewDetails.profile.education.length > 0 && (
              <>
                <h2 className="text-lg font-bold mt-6 mb-2">Education</h2>
                <div className="flex flex-col gap-2">
                  {viewDetails.profile.education.map((education, index) => (
                    <div key={`${education.degree_name}-${index}`}>
                      <span className="block text-sm text-gray-600 font-semibold">{`${education.degree_name} in ${education.field_of_study} at ${education.school}`}</span>
                      <span className="block text-sm text-gray-500">
                        {education.starts_at?.day &&
                          `${education.starts_at.day}/${education.starts_at.month}/${education.starts_at.year} - `}

                        {education.ends_at?.day
                          ? `${education.ends_at.day}/${education.ends_at.month}/${education.ends_at.year}`
                          : "Present"}
                      </span>
                    </div>
                  ))}
                </div>
              </>
            )}
          </DialogDescription>
        </DialogHeader>
      </DialogContent>
    </Dialog>
  );
};

export default Modal;
This is the result with experiences and education shown:
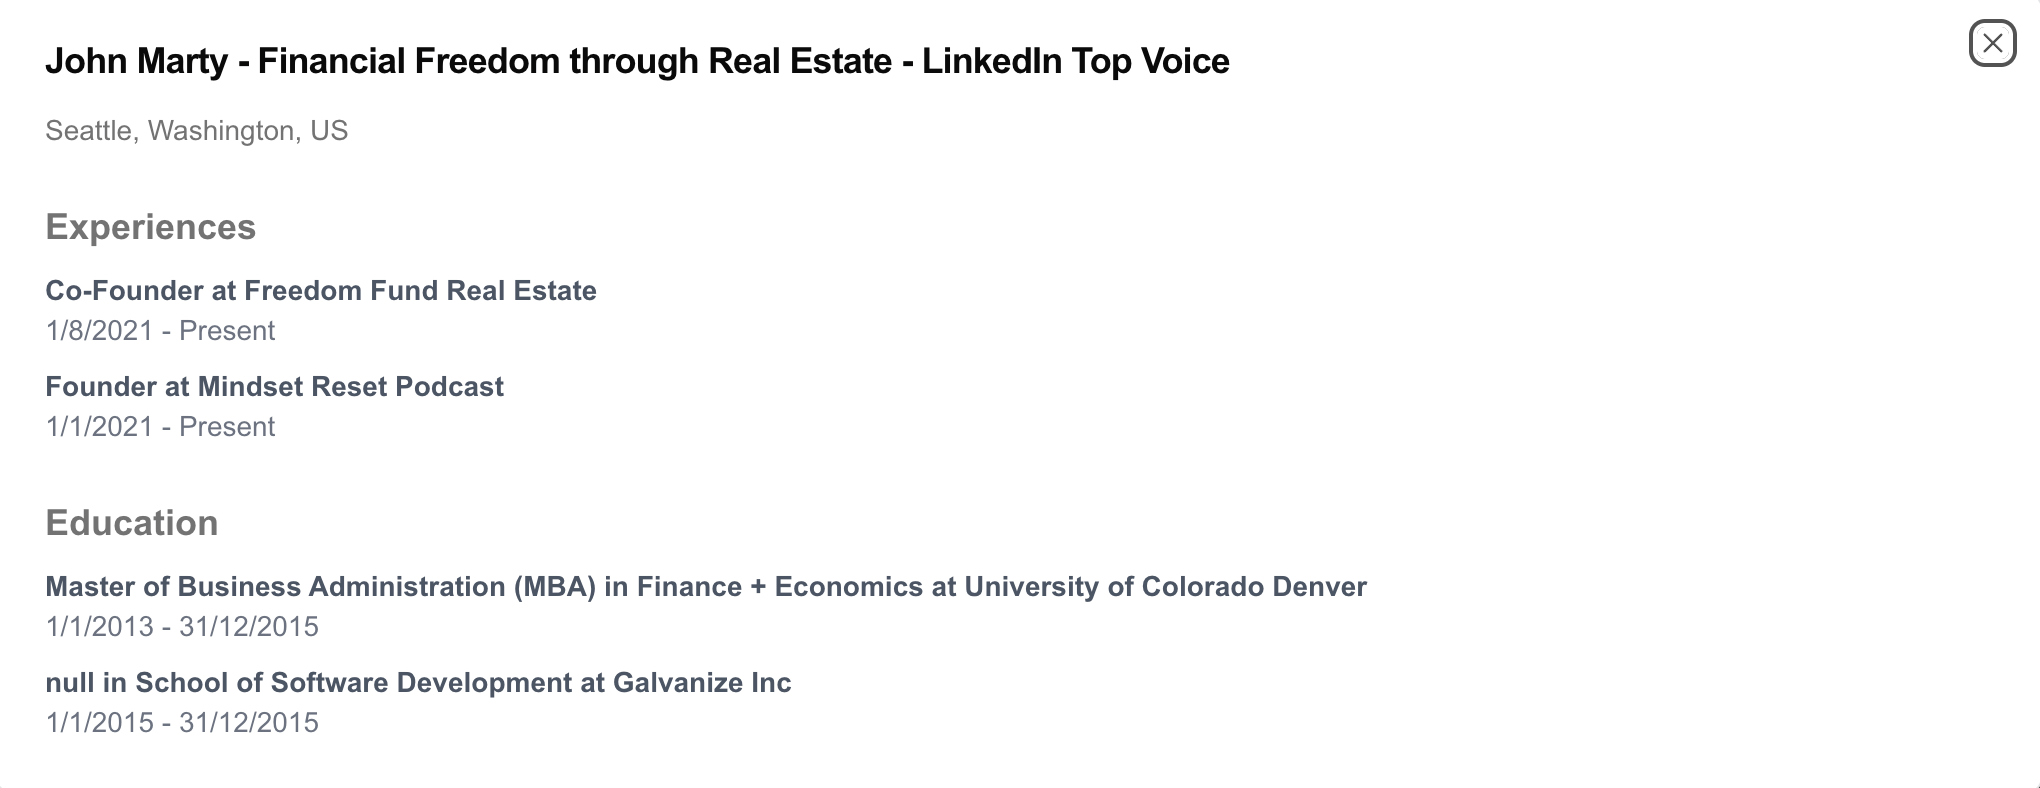
Full results, with experiences and education.
Now to prepare for fetching data from Proxycurl's API, let's create a loader while we wait for the response.
Create components/Loader.jsx:
import React from "react";

const Loader = () => {
  return (
    <div className="flex flex-col justify-center items-center h-screen">
      <div className="animate-spin rounded-full h-32 w-32 border-t-4 border-b-4 border-blue-600"></div>
      <div className="text-2xl font-bold mt-6">Loading...</div>
    </div>
  );
};

export default Loader;
And then modify app/page.js:
const [isLoading, setIsLoading] = useState(true);

<div className="w-3/4 bg-white rounded-lg p-4">
  {isLoading && <Loader />}
  {!isLoading && (
    <>
      <h3 className="font-bold">People profiles results</h3>
      <PeopleResult
        results={peopleResults}
        selectedPeople={selectedPeople}
        setSelectedPeople={setSelectedPeople}
      />
    </>
  )}
</div>
Now you get the spinner while results load:
Another nice UX touch.
Input the API key
In the clone, I built a way for you to input your Proxycurl API key for the clone to work, the Settings button on top. In your own application meant for end users, feel free to remove this part if your users do not need to input any API key.
Create components/SettingsModal.jsx:
import React from "react";
import { Dialog, DialogContent, DialogTitle } from "@/components/ui/dialog";
import { Input } from "@/components/ui/input";
import { Button } from "@/components/ui/button";

const SettingsModal = ({
  isSettingsOpen,
  setSettingsOpen,
  apiKey,
  setApiKey,
}) => {
  const handleSaveApiKey = () => {
    localStorage.setItem("apiKey", apiKey);
    setSettingsOpen(false);
  };

  return (
    <Dialog open={isSettingsOpen} onOpenChange={setSettingsOpen}>
      <DialogContent>
        <DialogTitle>Settings</DialogTitle>
        <h1>Add your API key</h1>
        <Input
          type="text"
          placeholder="API key"
          value={apiKey}
          onChange={(e) => setApiKey(e.target.value)}
        />
        <Button className="w-min mt-4" onClick={handleSaveApiKey}>
          Save
        </Button>
      </DialogContent>
    </Dialog>
  );
};

export default SettingsModal;
And modify app/page.js:
const [apiKey, setApiKey] = useState(null);
const [isSettingsOpen, setIsSettingsOpen] = useState(false);

useEffect(() => {
  const savedApiKey = localStorage.getItem("apiKey");
  if (savedApiKey) {
    setApiKey(savedApiKey);
  }
}, []);

</Tabs>
<SettingsModal
  isSettingsOpen={isSettingsOpen}
  setSettingsOpen={setIsSettingsOpen}
  apiKey={apiKey}
  setApiKey={setApiKey}
/>
</div>
Now you can add your API key.
If you are adapting this for NinjaPear instead, store your NinjaPear API key the exact same way. No need to change the UX just because the backend changed.
Simply input your API key to get the data needed for the app.
Make the live API call
Modify components/PeopleFilter.jsx:
import { useState } from "react";
import countryISO from "@/lib/countryISO.json";

const PeopleFilter = ({ setIsLoading, setPeopleResults, apiKey }) => {
  const [error, setError] = useState([]);
  const [payload, setPayload] = useState({
    country: "",
    current_role: "",
    current_company_name: "",
  });

  const handleSearch = async () => {
    setError([]);
    let hasError = false;

    if (payload.country === "") {
      setError((prev) => [...prev, "Country is required"]);
      hasError = true;
    }

    if (!apiKey) {
      setError((prev) => [...prev, "Please enter your API key in the settings"]);
      hasError = true;
    }

    if (hasError) return;

    try {
      setIsLoading(true);

      const params = new URLSearchParams({
        country: countryISO.find((country) => country.label === payload.country).value,
        page_size: 10,
        enrich_profiles: "enrich",
      });

      if (payload.current_role) {
        params.append("current_role_title", payload.current_role);
      }

      if (payload.current_company_name) {
        params.append("current_company_name", payload.current_company_name);
      }

      const response = await fetch(`/api/peopleSearch?${params.toString()}`, {
        method: "GET",
        headers: {
          Authorization: `Bearer ${apiKey}`,
        },
      });

      const data = await response.json();
      setPeopleResults(data.results);
    } catch (error) {
      console.log(error, "error");
    }

    setIsLoading(false);
  };

  return (
    <>
      {/* your existing filter JSX */}
      {error &&
        error.map((err) => (
          <p className="text-red-500 text-sm font-semibold text-center mt-2" key={err}>
            {err}
          </p>
        ))}
    </>
  );
};
Now when users search with an empty API key or location, they get a clear error state.
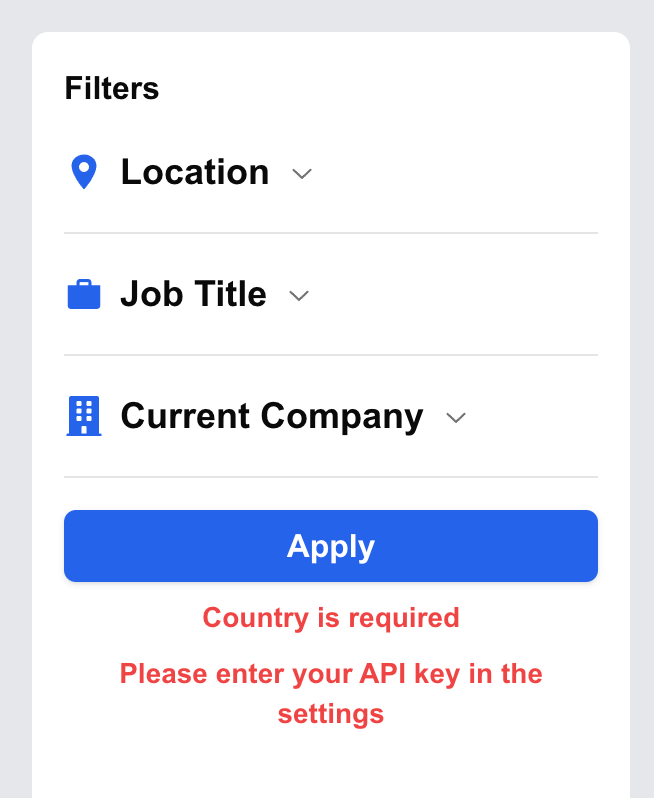
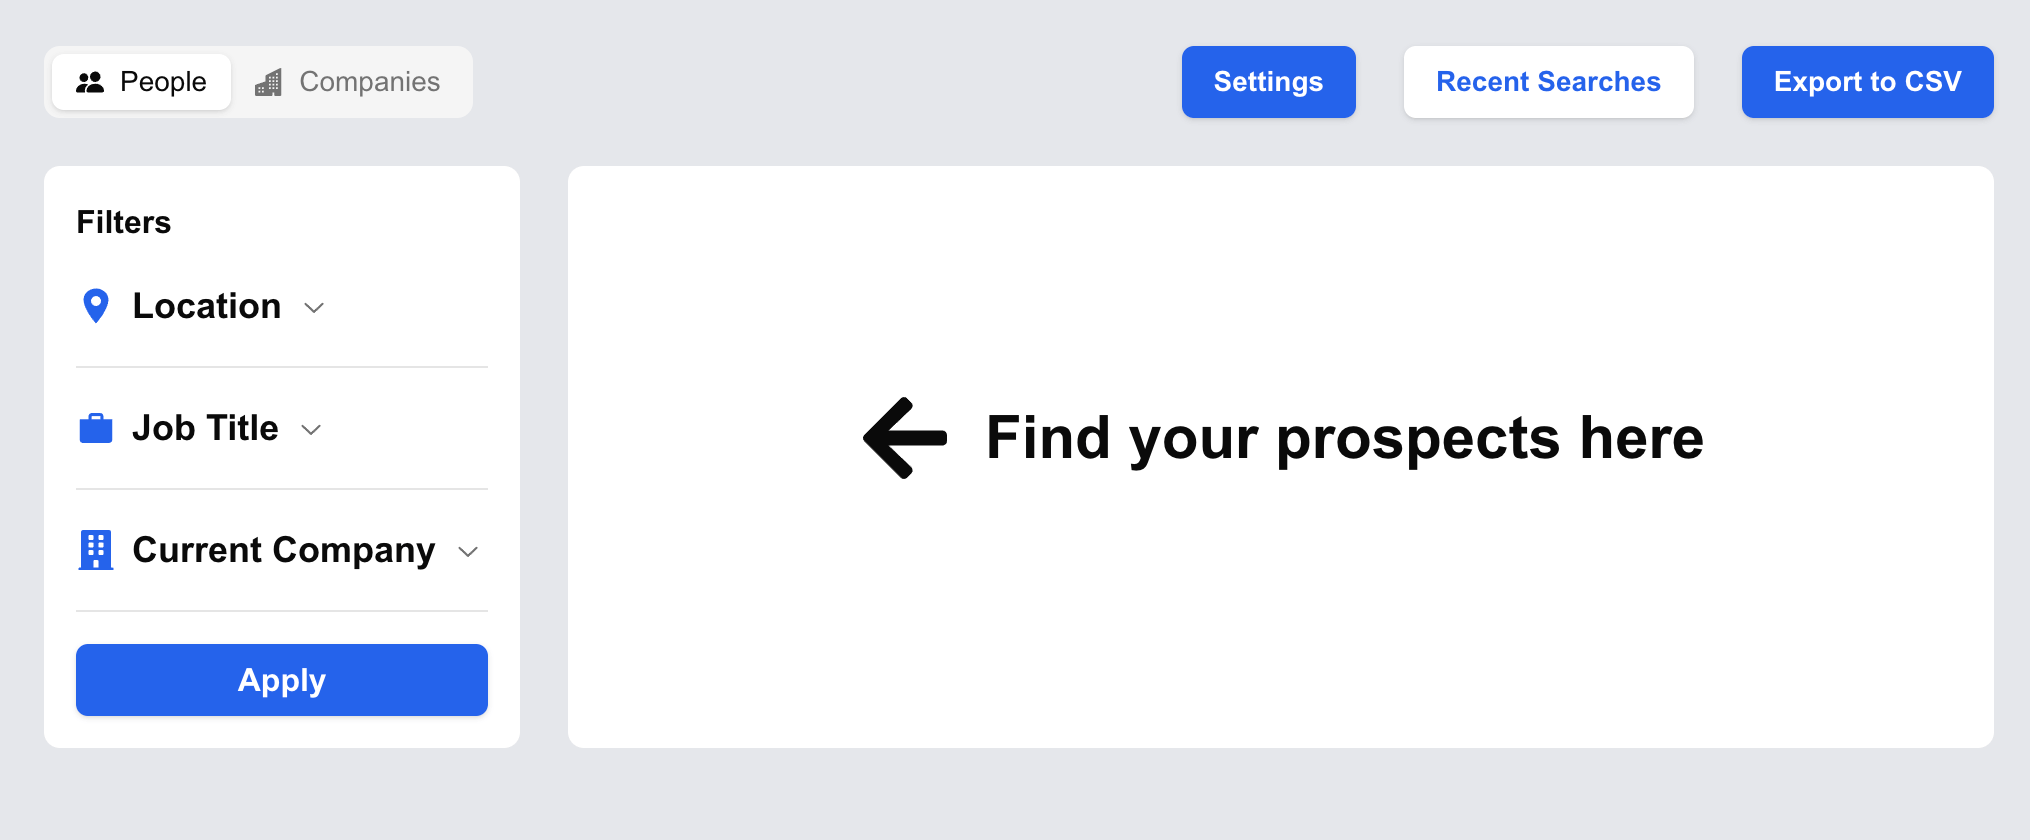
Next, let's handle the empty state in components/PeopleResult.jsx:
<div>
  {!isLoading && results.length === 0 && (
    <div>
      <span className="flex items-center gap-4 w-full justify-center mt-24">
        <FaArrowLeft className="text-5xl" />
        <span className="text-3xl font-semibold">Find your prospects here</span>
      </span>
    </div>
  )}
</div>
You get this view before any input is submitted:
Lastly, we need a Next.js API route to make the API call.
Create app/api/peopleSearch/route.js:
import { NextResponse } from "next/server";

export async function GET(request) {
  const params = request.url.split("?")[1];

  try {
    const response = await fetch(
      `https://nubela.co/proxycurl/api/v2/search/person?${params}`,
      {
        headers: {
          Authorization: request.headers.get("Authorization"),
        },
      }
    );

    const data = await response.json();
    return NextResponse.json(data);
  } catch (error) {
    console.log(error);
    return NextResponse.json({ error });
  }
}
And there you go, you've successfully created this little monster, which is the Lusha sales prospecting clone.

Voila. Try it yourself.
NinjaPear adaptation notes
This is the part I would actually pay attention to if I were building this today.
Proxycurl is sunset. So if you copy the UI and then wire it to the old endpoint above, you are learning from history, not building for production.
What stays the same:
- The filter UX
- The local storage pattern for API key and recent searches
- The result list layout
- The details modal
- The CSV export flow
- The server-side proxy route inside Next.js
What changes with NinjaPear:
- Use NinjaPear's Employee API as the profile enrichment source
- Use NinjaPear's Company API when you need company details to support the company column or company-side filtering
- If you want the finished workflow instead of building the whole thing, use Prospector, which is basically a spreadsheet with superpowers for prospect generation, customer expansion and work email enrichment
In other words, the architecture is still valid:
- Collect filter inputs on the client
- Send them to your own Next.js API route
- Call the upstream data API from the server
- Normalize the response into a stable
results[]shape - Render the list and modal off your own shape, not the vendor's raw JSON
That last point matters. A lot. If I were rebuilding this from scratch, I would add a mapNinjaPearPersonToUI() function and keep every component ignorant of the upstream provider.
Something like this:
export function mapNinjaPearPersonToUI(person: any) {
  return {
    id: person.id,
    linkedin_profile_url: person.linkedin_profile_url || null,
    profile: {
      full_name: person.full_name,
      headline: person.bio || person.role || null,
      city: person.city || null,
      state: person.state || null,
      country: person.country || null,
      experiences: (person.work_experience || []).map((job: any) => ({
        title: job.role,
        company: job.company_name,
        company_linkedin_profile_url: null,
        location: null,
        starts_at: job.start_date || null,
        ends_at: job.end_date || null,
      })),
      education: (person.education || []).map((edu: any) => ({
        degree_name: edu.major,
        field_of_study: edu.major,
        school: edu.school,
        starts_at: edu.start_date || null,
        ends_at: edu.end_date || null,
      })),
    },
  };
}
Not perfect. Good enough. More importantly, it decouples your UI from the data vendor.
Here is a cleaner server route for the NinjaPear path:
import { NextRequest, NextResponse } from "next/server";

export async function POST(request: NextRequest) {
  const { personName, employerWebsite, role } = await request.json();

  const response = await fetch("https://nubela.co/api/v1/employee/profile", {
    method: "GET",
    headers: {
      Authorization: `Bearer ${process.env.NINJAPEAR_API_KEY}`,
    },
  });

  const person = await response.json();

  return NextResponse.json({
    results: [mapNinjaPearPersonToUI(person)],
  });
}
That snippet is intentionally simple. In a real build, I would validate inputs, branch between name + company and role + company, and cache successful lookups for a few minutes.
A good reminder from X: the data underneath your shiny UI matters more than the shiny UI.
Your sales team does not need another AI SDR. It needs a CRM janitor. Most B2B teams are trying to automate prospecting before they fix the mess already inside HubSpot. Bad idea. Dirty CRM data kills every “AI agent” you build on top of it.
— Jet (@jettonext) Mon May 18 13:04:34 +0000 2026
GitHub project
The original full code is still here: the full code on our GitHub repo.
I also need to be straight with you about the NinjaPear repo request. I could not verify an official public GitHub project from Nubela that already replicates this exact Lusha clone on NinjaPear. I am not going to fake a repo link just to make the article look complete.
So the honest version is this:
- Verified today: the original Proxycurl clone repo exists
- Not verified today: an official public NinjaPear-specific clone repo for this exact tutorial
- What I would do instead: fork the original repo, replace the upstream API layer first, add a vendor-normalization function, and keep the UI untouched
If an official NinjaPear-specific clone repo is published under the Nubela GitHub later, I would use that instead of the sunset Proxycurl version.
If I rebuilt this today
I would make three changes immediately:
- Replace the old search endpoint with a provider abstraction
- Normalize all person data into one UI shape before rendering
- Keep the CSV export and recent searches entirely vendor-agnostic
That architecture lets you swap old Proxycurl, current NinjaPear, or even a totally different upstream later without rewriting the app.
And yes, this is where products like Prospector become useful. If you want the outcome, a spreadsheet of target accounts and people, faster than hand-building the whole UI, that is the shortcut. If you want the learning, keep building the clone yourself.
Proxycurl powered many applications like this
Congratulations, you made it to the end.
This is your reward as promised: the full code on our GitHub repo.
And the link to the clone that I built again.
At Proxycurl, we had a full suite of API products and LinkDB, a database of close to 500 million public LinkedIn profiles, that powered many use cases. HR recruitment, sales prospecting, marketing growth, investment prospecting and more. It did a lot of heavy lifting for our customers.
Today, the continuation of that work is NinjaPear, with products like Prospector, the Employee API, Company API, Customer API and Monitor API. Same obsession with useful B2B data. Better product direction.
We are still developer-first. That part did not change. I still care about the same thing I cared about when I built Proxycurl: helping you get from data source to working product fast, without configuration hell.
If you are building this clone for real, keep the UI from this article, keep the local storage ideas, and swap the upstream into NinjaPear before you ship it. That is the practical next step.
Have fun building, and reach out to us via email or live chat if you have any questions.
We recently launched a writing program for our developer community. If you're interested to write technical pieces for us, reach out to us at [email protected]. We'll be glad to get in touch.